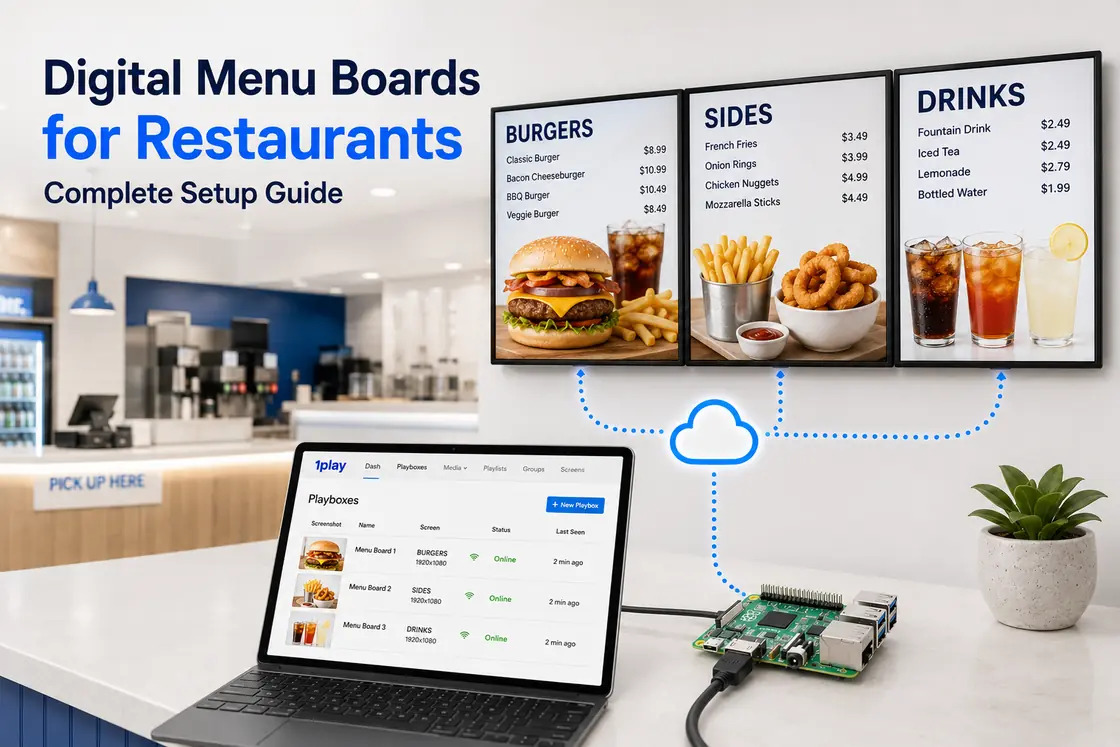
A restaurant menu changes more often than most printed signs. Prices change, ingredients become unavailable, breakfast ends, lunch begins, seasonal products arrive, and a promotion may need to go live today rather than next week.
Digital menu boards give restaurants a practical way to manage those changes without repeatedly printing and replacing physical boards. A TV or commercial display presents the menu, a small media player delivers the content, and digital signage software lets the restaurant update and schedule what appears on screen.
The result can be as simple as one TV in a café or as extensive as several screens across a chain of restaurants.
This complete guide explains:
- what digital menu boards are and when they make sense;
- how many screens you may need;
- which TV, player and accessories to choose;
- how to set up a restaurant menu board with Raspberry Pi and 1Play;
- how to design a menu that customers can read quickly;
- how to schedule breakfast, lunch, dinner and promotions;
- how to manage several screens or restaurant locations;
- what happens if the internet connection fails;
- what a realistic setup costs;
- which common mistakes to avoid.
What Is a Digital Menu Board?
A digital menu board is a screen that displays menu items, prices, product photographs, promotions and restaurant information. It normally replaces or complements printed menu panels positioned above a counter, near an entrance, in a waiting area or beside a drive-through ordering point.
A complete digital menu board system has three main parts:
- The display: a TV, monitor or commercial signage screen.
- The media player: a compact device connected to the display through HDMI.
- The content-management software: the platform used to upload, organize, schedule and publish menu content.
With 1Play digital signage, a Raspberry Pi becomes the media player, called a Playbox. It downloads the assigned menu content and displays it on the connected TV. The restaurant manages the screen remotely from the 1Play cloud dashboard.
The TV itself does not need to be smart. It only needs a suitable HDMI input, the required resolution and enough brightness for the environment.
Digital Menu Board vs Printed Menu Board
Printed boards still make sense when a menu is very small, changes rarely and does not require time-based promotions. Digital menu boards become more useful as the menu or operating workflow becomes more dynamic.
| Requirement | Printed menu board | Digital menu board |
|---|---|---|
| Change a price | Reprint or replace the board | Update and republish content |
| Switch breakfast to lunch | Manual replacement | Scheduled automatically |
| Promote a limited-time item | Requires new printed material | Add it to a scheduled playlist |
| Use photographs or motion | Static only | Images, video and animation |
| Update several locations | Print and distribute files or boards | Publish remotely from one dashboard |
| Correct an error | Physical intervention required | Correct the file and republish |
| Verify what is displayed | Visit or ask local staff | Check player status and a remote screenshot |
| Initial complexity | Very low | Screen, player and software setup required |
Digital is not automatically better in every situation. A small restaurant with one permanent menu and no promotions may be satisfied with a printed sign. The operational advantage appears when information changes frequently or must remain consistent across several screens.
Why Restaurants Use Digital Menu Boards
The strongest reasons are operational, not decorative.
Update prices and availability faster
A digital workflow reduces the delay between approving a change and displaying it. If a product becomes unavailable, a price changes or a spelling error is discovered, the restaurant can update the approved menu file and publish the replacement remotely.
The process still needs control. Someone must confirm that the price is correct, the new file is assigned to the right screen and the update has synchronized. Digital signage makes the correction faster; it does not eliminate the need for review.
Schedule menus by time of day
Restaurants often serve different products during different parts of the day. A breakfast menu may be relevant until 11:00, followed by lunch, afternoon offers and dinner.
Instead of asking staff to change files manually, digital menu board software can schedule the appropriate playlist by time and day. This is usually called dayparting.
Promote high-priority products
A menu board does more than list products. It can reserve space for:
- a meal combination;
- a seasonal drink;
- a new dessert;
- a limited-time offer;
- a premium upgrade;
- a promotion valid only during quiet hours.
These areas should support the menu rather than distract from it. The customer must still be able to find products and prices quickly.
Keep several screens consistent
When a restaurant has two, three or five menu screens, updating each TV from a separate USB stick creates opportunities for mistakes. One screen may retain an old price, another may play the wrong file, and a third may stop at a media-selection menu after a restart.
Cloud digital signage centralizes the approved files, playlists and schedules. For a detailed comparison of both workflows, read Digital Signage vs USB Stick: Which Is Better for Your Business?.
Manage more than one restaurant
A restaurant group can manage shared national or regional campaigns while keeping location-specific prices or offers on selected screens. The same dashboard can control one restaurant today and a larger screen network later.
Plan the Menu Board Before Buying Hardware
The most common setup mistake is buying screens first and designing the menu afterward. The menu structure should determine the number, orientation and placement of the displays.
Answer the following questions before ordering equipment.
Where will customers read the menu?
Identify the real decision point:
- above the ordering counter;
- at the entrance;
- in a queue;
- beside a pickup area;
- at a bar;
- inside a food court;
- in a drive-through lane;
- on a street-facing window.
The viewing distance, ambient light and time available to read the menu are different in each location. An indoor counter screen and an outdoor drive-through display should not be treated as the same hardware project.
How much information must be visible at once?
Count the categories, products, descriptions, variants and prices. Then decide what customers genuinely need before they order.
If one screen forces the entire menu into tiny text, adding a second screen is usually better than compressing the layout. Another option is to simplify the content by removing descriptions that do not help the decision.
Will every screen show the same thing?
There are several common arrangements:
| Screen arrangement | Suitable use |
|---|---|
| One screen | Café, bakery, bar, small takeaway menu |
| Two screens | Food on one screen, drinks and offers on the other |
| Three screens | Categories divided across panels, with one promotional area |
| Four or more screens | Large quick-service menu, food court or high-volume operation |
| One separate portrait screen | Specials, dessert, loyalty message or queue-side promotion |
If every screen must be managed independently, each TV normally needs its own player. If the goal is one large visual extending across several screens, a synchronized video-wall configuration may be appropriate.
How often will the menu change?
List every expected change:
- breakfast, lunch and dinner;
- weekday and weekend menus;
- happy hour;
- seasonal products;
- temporary stock changes;
- price revisions;
- location-specific offers;
- scheduled campaigns.
This list becomes the basis of the playlist and scheduling structure.
Hardware Needed for Restaurant Digital Menu Boards
A reliable setup does not require proprietary all-in-one displays. You can use suitable TVs and add dedicated Raspberry Pi players.
1. TV or commercial display
For many indoor restaurants operating during normal business hours, a modern consumer TV can be sufficient. A commercial display may be more appropriate when the screen must run for very long hours, is installed in a bright window, is exposed to heat or grease, or requires a business-grade warranty.
Check:
- HDMI availability;
- Full HD or 4K resolution;
- brightness in the real installation area;
- viewing angles;
- VESA mounting compatibility;
- ventilation requirements;
- manufacturer support for the intended orientation;
- expected daily operating hours.
Do not select screen size by a generic rule alone. Create a full-size design sample and test it from the customer’s actual viewing position. A large screen with overcrowded content can still be difficult to read.
2. Raspberry Pi digital signage player
1Play uses Raspberry Pi hardware as the digital signage player. For a new restaurant installation:
- Raspberry Pi 5 is the preferred choice for demanding content and 4K playback;
- Raspberry Pi 4 remains suitable for many Full HD menu boards;
- older models are supported with more limited capabilities.
The player is compact enough to mount discreetly behind the TV or inside a ventilated equipment area. See the 1Play Raspberry Pi devices page for the platform’s hardware approach.
3. MicroSD card
Use a Class 10 microSD card with at least 16 GB. The card stores the 1Play system and locally cached content.
Larger cards may be useful when the playlist contains many high-resolution videos, but good media organization is more important than filling the player with unnecessary files.
4. Power supply
Use the official Raspberry Pi power supply or a high-quality compatible unit designed for the exact model.
Powering the player from a TV’s USB port may work on some displays, but the available current and shutdown behavior vary. For an unattended restaurant installation, a dedicated reliable power supply is the safer choice.
5. HDMI cable
Choose the correct HDMI connector for the Raspberry Pi model and a cable length appropriate for the mounting position. Avoid tightly bending the cable behind the TV or allowing its weight to pull on the port.
6. Mount, case and cable management
Use a secure VESA-compatible TV mount. Keep the player protected but ventilated, and route cables away from hot surfaces, food-preparation equipment, water and cleaning areas.
The installation must also leave safe service access. A technician should be able to replace a cable or microSD card without removing unrelated equipment.
7. Network connection
Ethernet is usually the most predictable choice when cabling is available. Wi-Fi can also work well, especially when the access point has strong coverage at the mounting location.
Do not test Wi-Fi only at floor level. Check signal quality behind the installed screen, where walls, metalwork and the TV itself may affect reception.
How to Set Up Digital Menu Boards With 1Play
The following workflow takes the project from planning to a working restaurant menu screen.
Step 1: Map the menu across the screens
Create a simple content map before designing anything.
For a three-screen quick-service restaurant, the map might be:
- Screen 1: burgers and meal combinations;
- Screen 2: chicken, vegetarian options and sides;
- Screen 3: drinks, desserts and current promotion.
Keep categories in stable positions whenever possible. Customers and employees learn where to look, and later updates become easier.
Step 2: Create a 1Play account
Create your 1Play account and use the included 30-day free trial to test the complete workflow. No credit card is required.
Start with one screen and a small approved menu. Confirm that the hardware, network, content and operating process work before installing every display.
Step 3: Prepare the Raspberry Pi
Install the official Raspberry Pi Imager on a computer and write the 1Play image to the microSD card.
In Raspberry Pi Imager, select:
- Choose OS
- Freemium and paid-for OS
- Digital Signage OS
- 1Play Digital Signage
Alternatively, download the current compatible image and write it using a supported imaging tool. Follow the latest instructions on the 1Play DIY setup page.
Step 4: Install and connect the player
With the TV switched off:
- insert the prepared microSD card into the Raspberry Pi;
- connect the HDMI cable to the TV;
- connect Ethernet if you are using a wired network;
- connect the Raspberry Pi power supply;
- select the correct HDMI input on the TV;
- wait for the player to boot.
When setup is ready, the display shows an unregistered Playbox and its unique ID.
Step 5: Register the Playbox
Log in to the 1Play dashboard, open the Playboxes section and add the new player using the ID displayed on the TV.
Use a clear naming system from the first installation. For example:
Bucharest-Centre-Menu-01Bucharest-Centre-Menu-02Bucharest-Centre-Promo-01
A consistent name identifies the location, purpose and screen number without opening each device record.
Step 6: Create the menu content
Design the menu at the display’s native aspect ratio:
1920 × 1080for Full HD landscape;3840 × 2160for 4K landscape;- the corresponding reversed dimensions for portrait content.
You can create menu graphics in your preferred design software and export them as high-quality images or videos. 1Play does not require a specific design application.
Create separate files for each screen and daypart. Use descriptive filenames such as:
menu01-breakfast-v03.pngmenu01-lunch-v07.pngmenu02-dinner-v04.pngpromo-summer-drink-2026-09.mp4
Versioned filenames make review and rollback easier than names such as final-new-latest.png.
Step 7: Upload media and build playlists
Upload the approved menu files to 1Play, then create playlists for the required screens and time periods.
A simple structure could include:
- Breakfast Menu;
- Lunch Menu;
- Dinner Menu;
- Weekend Menu;
- Current Promotions;
- Emergency Default Menu.
Keep operational menu content separate from short-term promotions. This prevents an expired campaign from being embedded permanently in the only copy of the menu.
Step 8: Schedule dayparts
Assign playlists to the correct Playboxes or screen groups and configure the schedule.
Example:
| Time | Playlist |
|---|---|
| 06:30–10:59 | Breakfast Menu |
| 11:00–14:59 | Lunch Menu |
| 15:00–17:29 | Afternoon Menu |
| 17:30–closing | Dinner Menu |
Allow a short operational margin around real kitchen changeover times. Do not show breakfast for another hour if the kitchen can no longer serve it, and do not publish dinner products before they are available.
Step 9: Test from the customer’s position
Do not approve a menu only from a laptop.
Stand where customers enter the queue and check:
- whether category names are immediately visible;
- whether item names and prices can be read comfortably;
- whether glare hides part of the screen;
- whether important content sits behind hanging lights or signs;
- whether photos look natural on the TV;
- whether transitions are calm enough to follow;
- whether every price matches the approved source;
- whether all screens switch dayparts at the correct time.
Ask someone unfamiliar with the layout to find three specific products and prices. If the task takes too long, simplify the menu.
Step 10: Verify and maintain the system
After publishing, check that every Playbox is online and use near-real-time screenshots to confirm what is displayed. Proof-of-play reports can help verify which content ran and when.
Create a simple operating routine:
- verify screens at opening;
- review scheduled changes before they go live;
- remove expired promotions;
- check the dashboard after major updates;
- keep an approved fallback menu available;
- review mounts, cables and ventilation periodically.
Digital Menu Board Design Best Practices
The best menu board is not the one with the most animation. It is the one that helps customers understand the offer and order confidently.
Build a clear visual hierarchy
Use three levels:
- category headings;
- product names and key choices;
- prices and short supporting information.
Make the most important categories easy to scan. Avoid giving every item the same visual weight.
Design for distance, not for a laptop
Text that looks large on a computer may be unreadable above a restaurant counter. Test the final file on the actual screen at the actual viewing distance.
Use high contrast, simple typefaces and enough spacing between products. Avoid long paragraphs, thin decorative fonts and text placed over busy photographs.
Use food photography selectively
One strong photograph of a priority product can be more effective than ten small images. Use real, accurate photographs that match what the customer will receive.
Do not let decorative imagery reduce the space required for names, prices and choices.
Keep prices visually consistent
Use one price format throughout the menu. Align prices consistently and make the relationship between each product and its price unmistakable.
Before publication, compare the screen files with the restaurant’s approved pricing source. A digital menu can be updated quickly, but it can also distribute an error quickly if the review process is weak.
Limit motion near essential information
Short video can attract attention to a promotion, but a constantly changing menu makes ordering harder. Keep essential products and prices visible long enough to read.
A useful approach is to keep the core menu static and use a dedicated promotional area for motion.
Respect safe margins
Keep important text away from the outer edges. Some TVs apply overscan or have bezels that visually reduce the usable area.
Test every TV model before duplicating the same layout across locations.
Include legally required information
Allergen, nutritional, tax and pricing-display requirements differ by country and restaurant type. Confirm the rules that apply to each location and make sure the digital format does not omit information required elsewhere in the ordering process.
Static Images, Video or a Live Web Menu?
1Play can display several content types, but the simplest format is often the most reliable.
Static menu images
Static images are easy to approve, quick to load and predictable on screen. They are a strong default for product names, descriptions and prices.
Video menu content
Video is useful for short promotional zones, product preparation, seasonal campaigns or brand content. Avoid turning the entire menu into a rapid video sequence.
Web pages and HTML applications
1Play can display web pages and HTML applications. This can support a menu generated by an external web system, but the content source must be designed for unattended full-screen display.
Do not assume that a POS system automatically integrates with 1Play. A POS-driven menu requires the POS or another service to provide a suitable web page, data feed or custom application. That integration must be designed, secured and tested separately.
For most independent restaurants, approved images combined with scheduled playlists provide the simplest operational workflow.
What Happens if the Internet Goes Down?
The restaurant’s current menu should not disappear because of a temporary internet outage.
1Play downloads assigned media to the Raspberry Pi and caches it locally. If connectivity is interrupted, the existing downloaded playlist continues playing. When the connection returns, the player can synchronize new content and settings.
There is an important limitation: a remote price or menu update cannot reach an offline player until it reconnects. If immediate changes are critical, the restaurant still needs a local contingency process.
Managing Digital Menu Boards Across Multiple Locations
Multi-location management works best when shared and local content are separated.
For example:
- Shared content: brand design, national campaigns, standard products;
- Regional content: language, seasonal offer, local promotion;
- Location content: price, opening hours, product availability.
Organize Playboxes by location and purpose. Use playlists and groups so that the correct content reaches the correct screens without duplicating the entire workflow.
Before a network-wide update:
- test it on one representative screen;
- confirm prices and dates;
- check the screenshot;
- publish to the intended group;
- verify that the players have synchronized;
- retain the previous approved menu until the rollout is confirmed.
This controlled rollout is especially useful when restaurants use different TV resolutions or layouts.
How Much Do Restaurant Digital Menu Boards Cost?
The total cost includes the displays, players, mounts, installation, network access, content design and software.
| Cost item | Typical treatment |
|---|---|
| Existing suitable TV | No new display purchase |
| New consumer or commercial display | Varies by size, brightness and duty cycle |
| Raspberry Pi player kit | One required for each independently managed TV |
| Mount and cabling | One-time installation cost |
| Menu design | Internal staff, freelancer or agency cost |
| 1Play software | Based on each active screen and purchased usage volume |
At the standard 1Play rate, one active screen costs €0.19 per day, equivalent to €5.70 per 30 days. Volume pricing can reduce this to €0.13 per active screen per day, or €3.90 per 30 days. Prices exclude VAT.
For example, three active restaurant menu screens cost €17.10 per 30 days at the standard software rate. Hardware, displays, installation and content creation are separate.
An inactive screen does not consume paid usage, which can be useful for seasonal restaurants or temporary displays. See the current 1Play pricing page before calculating a final budget.
For a broader cost analysis, see How Much Does Digital Signage Really Cost in 2026?.
Restaurant Setup Examples
Example 1: Independent café with one TV
The café displays coffee, pastries, breakfast products and one seasonal drink on a single Full HD screen.
It uses separate weekday and weekend playlists. The owner updates the menu image when prices change and uses a short promotional slide for the seasonal drink.
This setup prioritizes simplicity: one TV, one Raspberry Pi, one core menu and a small number of scheduled changes.
Example 2: Quick-service restaurant with three screens
The first screen shows main meals, the second shows sides and alternatives, and the third shows drinks, desserts and promotions.
Breakfast and lunch playlists switch automatically. Each screen has its own Playbox and clearly named media files. The manager checks all three remote screenshots after every major update.
Example 3: Pizzeria with frequent product changes
The pizzeria maintains a stable core menu but changes the pizza of the week and limited ingredients regularly.
The core price files remain separate from the promotional content. This lets staff replace the temporary offer without redesigning the entire menu.
Example 4: Restaurant chain with local pricing
The chain uses the same brand layout in every location, but selected restaurants have different prices and regional offers.
Shared campaign content is distributed broadly, while location-specific menu files are assigned only to the correct Playboxes. The naming system includes city, restaurant and screen number to reduce publishing errors.
Common Digital Menu Board Mistakes
Trying to fit too much onto one screen
Adding more text is not a substitute for another screen or a simpler menu. If customers cannot read the board quickly, the installation has failed its main purpose.
Designing before measuring the viewing environment
Screen size, mounting height, lighting and customer position affect the design. A layout approved in an office may perform poorly above a counter.
Using TV USB power without testing
An underpowered Raspberry Pi can restart or behave unpredictably. Use a suitable dedicated power supply for reliable operation.
Depending on Wi-Fi that was never tested behind the screen
Verify connectivity after installation, not only before the TV is mounted.
Embedding every promotion into the main menu
Separate long-term menu content from short-term campaigns. Otherwise, removing an expired promotion requires rebuilding the entire board.
Publishing without a price review
Digital distribution is fast. A wrong price can reach every screen just as quickly as a correct one.
Using excessive animation
Motion should support attention, not make the menu difficult to follow.
Assuming cloud playback requires continuous internet
With cached offline playback, downloaded menus continue running during a temporary connection loss. However, new changes still require the player to reconnect.
Digital Menu Board Launch Checklist
Before launch, confirm:
- Every product name and price matches the approved source.
- Required allergen or regulatory information is available.
- Menu files use the correct Full HD or 4K dimensions.
- Text is readable from the real ordering position.
- Screens have adequate brightness and no critical glare.
- Each Raspberry Pi has a reliable power supply.
- HDMI cables and mounts are secure.
- Network coverage has been tested behind each screen.
- Every Playbox has a clear location-based name.
- The correct playlist is assigned to each screen.
- Breakfast, lunch, dinner and weekend schedules have been tested.
- Remote screenshots show the expected content.
- Offline playback has been tested safely.
- Expired campaign dates are documented.
- A previous approved menu or fallback playlist is available.
- Someone is responsible for reviewing future changes.
Why Use 1Play for Restaurant Digital Menu Boards?
1Play combines widely available Raspberry Pi hardware with cloud screen management.
For restaurant menu boards, the practical benefits include:
- using an existing TV with HDMI;
- managing screens remotely from one dashboard;
- organizing menu screens and locations with groups;
- scheduling playlists by time and day;
- continuing downloaded playback during internet interruptions;
- checking players with near-real-time screenshots;
- reviewing proof-of-play reports;
- supporting Full HD and 4K menu content;
- using landscape or portrait screens;
- scaling from one screen to many locations;
- paying only for active screens;
- testing the system for 30 days without a credit card.
If you already have a suitable TV, you can turn it into digital signage by connecting a Raspberry Pi Playbox instead of replacing the display.
Frequently Asked Questions
What do I need for a restaurant digital menu board?
You need a TV or commercial display with HDMI, a Raspberry Pi player, a Class 10 microSD card of at least 16 GB, a compatible HDMI cable, a reliable power supply, a network connection and digital signage software such as 1Play.
Do I need a smart TV?
No. A normal TV with HDMI can work because the Raspberry Pi runs the menu content and communicates with the 1Play dashboard.
Can I use my existing restaurant TV?
Yes, if it has HDMI, suitable resolution and brightness, reliable operation and a safe mounting position. Check its warranty and ventilation requirements for the intended daily operating hours.
Do I need one Raspberry Pi for every screen?
Yes, each independently controlled TV normally needs its own Playbox. All Playboxes can be managed from the same 1Play account.
Can I show different menus at breakfast, lunch and dinner?
Yes. Create separate playlists and schedule them by time of day and day of week. Match the switch times to real kitchen availability.
Can I change restaurant prices remotely?
Yes. Update the approved menu content, publish it to the correct screen or group, and verify the result. The player must be online to receive the new content.
What happens if the internet connection fails?
Previously downloaded content remains cached on the Raspberry Pi and continues playing. New updates synchronize after the player reconnects.
Can I use 4K digital menu boards?
Yes. 1Play supports Full HD and 4K content. Raspberry Pi 5 is recommended for new 4K installations. Create the menu at the correct native resolution and test the full playback workflow.
Can I install a digital menu board in portrait orientation?
Yes. 1Play supports portrait content. Confirm that the TV manufacturer permits the intended portrait installation and that ventilation remains adequate.
Can 1Play connect directly to my restaurant POS?
Do not assume a direct automatic integration. 1Play can display web pages and HTML applications, so a POS-driven menu may be possible if the POS or another system provides a suitable web interface, data feed or custom application. The integration must be built and tested separately.
How much does 1Play cost for one restaurant screen?
The standard rate is €0.19 per active screen per day, equivalent to €5.70 per 30 days, excluding VAT. Volume pricing can reduce the daily rate. Check the current pricing page before purchase.
Can I manage menu boards in several restaurants?
Yes. You can organize Playboxes by location or purpose, assign playlists to individual screens or groups, publish shared campaigns and retain location-specific menu content where required.
Can I test the system before paying?
Yes. New 1Play accounts include a 30-day free trial and no credit card is required.
Build a Menu Board That Is Easy to Read and Easy to Operate
A successful digital menu board project has two audiences.
Customers need a menu that is clear, attractive and easy to read. Restaurant staff need a system that is reliable, controlled and simple to update.
Start with the menu structure, not the screen. Decide what customers must see, divide the information across the right number of displays, design at the correct resolution and test everything from the ordering position.
Then build a repeatable operating workflow: approved files, clear Playbox names, separate playlists, accurate schedules, remote verification and a fallback menu.
With suitable TVs, Raspberry Pi players and 1Play, a restaurant can begin with one digital menu board and expand without replacing the management platform.
Start your free 30-day 1Play trial, connect your first restaurant screen and test the complete menu workflow before rolling it out to the rest of the location.