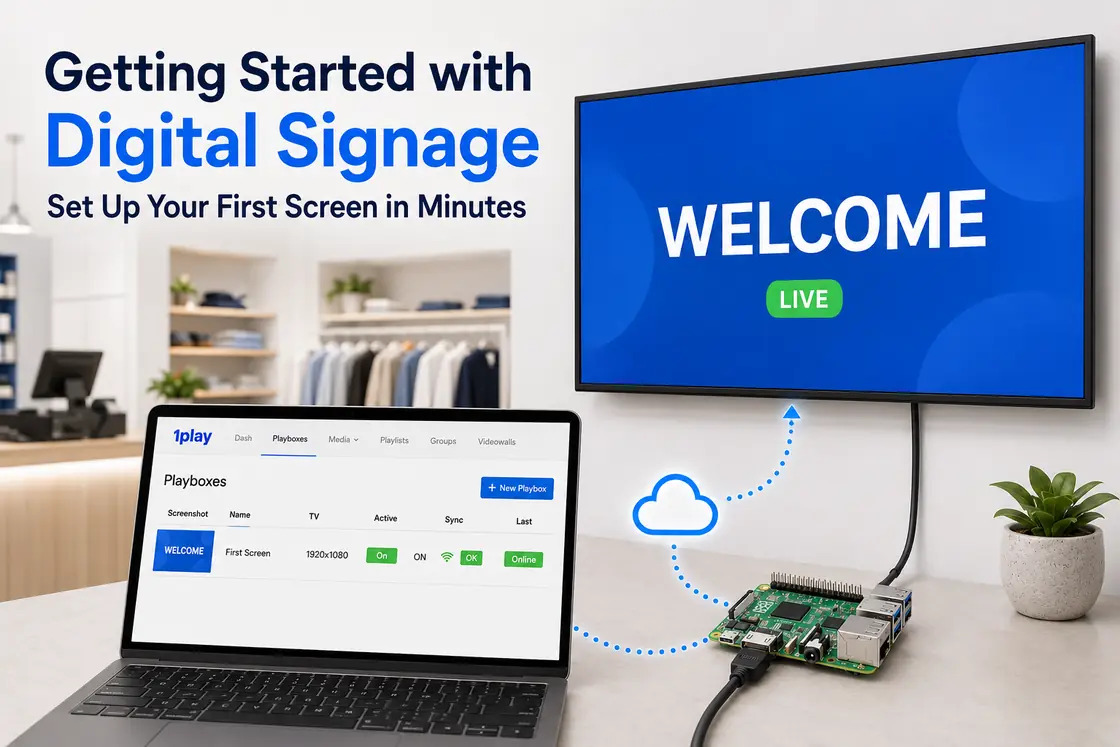
Getting started with digital signage does not require a local server, a proprietary display or advanced technical skills.
The basic system is simple:
- a TV or monitor displays the content;
- a small media player runs the content;
- cloud software lets you upload, organize and manage it remotely.
With 1Play, the media player is a Raspberry Pi, called a Playbox. Connect it to a TV through HDMI, register it in the cloud dashboard, upload an image or video, create a playlist and assign that playlist to the screen.
If your hardware, internet connection and first media file are ready, the final connection and publishing steps can be completed in a short setup session. Writing the microSD card and downloading media may take longer depending on your computer, card and connection speed.
This beginner-friendly guide takes you from unopened hardware to your first live digital sign. It also explains how to confirm that everything is working and how to fix the most common first-time setup problems.
The Quick Answer: How Do You Set Up Digital Signage?
To set up your first digital sign with 1Play:
- Create a free 1Play account.
- Prepare a Raspberry Pi 5 or Raspberry Pi 4 and a microSD card.
- Write the 1Play image to the card using Raspberry Pi Imager.
- Connect the Raspberry Pi to the TV, network and power supply.
- Register the Playbox using the unique ID shown on the TV.
- Upload your first image or video and create a playlist.
- Assign the playlist, wait for synchronization and verify the screen.
You can begin with one TV and one image. Scheduling, screen groups, web pages, reporting and other features can wait until the basic playback workflow is working reliably.
What You Need Before You Start
Prepare everything before switching on the player. A complete first-screen setup requires:
| Component | What to prepare |
|---|---|
| Display | TV or monitor with an available HDMI input |
| Player | Raspberry Pi 5 or Raspberry Pi 4 recommended |
| Storage | Class 10 microSD card, 16 GB or larger |
| Power | Official or high-quality compatible Raspberry Pi power supply |
| Video connection | HDMI cable compatible with the Pi and TV |
| Network | Ethernet connection or reliable Wi-Fi |
| Setup computer | Windows, macOS or Linux computer with a card reader |
| First content file | One simple landscape image, preferably 1920 × 1080 |
| Cloud account | Free 1Play account |
A case for the Raspberry Pi is optional but useful for physical protection. Choose one with adequate ventilation and make sure it does not place pressure on the HDMI or power connectors.
Choose a simple first content file
For the first test, use one image rather than a long 4K video or a complex web page.
A 1920 × 1080 landscape image is a practical choice for a Full HD TV. It downloads quickly, is easy to inspect and removes unnecessary variables from the first setup.
The image could contain:
- your business name and opening hours;
- a welcome message;
- one promotion;
- an event announcement;
- a simple menu or service list;
- a test graphic with clear edges and colors.
Once the image plays correctly, you can add more media and build a complete playlist.
Confirm that the TV has HDMI
The TV does not need to be smart. The Raspberry Pi handles playback and cloud communication, while the TV acts as the display.
Check that the TV has an available HDMI input and that you can select it using the remote control or the buttons on the display. If you want a deeper guide to screen compatibility and TV settings, read Turn Any TV Into Digital Signage.
Use a reliable power supply
Do not assume the TV’s USB port can reliably power the Raspberry Pi. Some TVs provide insufficient current, switch the USB port off unexpectedly or reduce power in standby.
For a digital sign expected to restart automatically and operate without supervision, use the official Raspberry Pi power supply or a high-quality compatible unit designed for your model.
Understand the Three Parts of the System
Before installing anything, it helps to understand what each part does.
The display shows the picture
The TV or monitor is only the visual output. It does not store your 1Play account or manage the playlist.
This separation means you can replace the TV later without rebuilding the content-management system. Connect the existing Playbox to a suitable replacement display, select the HDMI input and test the output.
The Playbox runs the content
A Raspberry Pi prepared with the 1Play image becomes a Playbox. It connects to the display through HDMI, downloads assigned media and plays the content.
1Play recommends Raspberry Pi 5 or Raspberry Pi 4 for the best experience. Raspberry Pi 5 is the preferred option for new 4K deployments, while Raspberry Pi 4 remains a strong choice for many Full HD projects.
Learn more about the hardware approach on the 1Play Raspberry Pi devices page.
The dashboard controls the screen
The cloud dashboard is where you register Playboxes, upload media, create playlists, assign content and check the screen remotely.
The player uses the internet to receive files and settings. After media is downloaded and cached locally, the current playlist can continue during a temporary connection interruption.
How to Set Up Your First Digital Sign With 1Play
Step 1: Create your free account
Create a 1Play account before preparing the player. Every new account includes a 30-day free trial, and no credit card is required.
Log in to the dashboard and take a quick look at the main sections:
- Playboxes for registered Raspberry Pi players;
- Media for uploaded content;
- Playlists for content order and playback;
- Groups for managing several Playboxes together.
You only need the first three sections for a basic one-screen test.
Step 2: Write the 1Play image to the microSD card
Install the official Raspberry Pi Imager on your computer and insert the microSD card into the card reader.
In Raspberry Pi Imager, select:
- Choose OS
- Freemium and paid-for OS
- Digital Signage OS
- 1Play Digital Signage
Then select the correct microSD card and start writing.
The card will be erased, so confirm that it does not contain files you need. When writing and verification are complete, eject the card safely.
You can also download the current 1Play image and write it with a compatible imaging tool. The supported versions and current instructions are available on the 1Play DIY setup page.
Step 3: Connect the Raspberry Pi to the TV
Keep the Raspberry Pi unpowered while making the connections.
- Insert the prepared microSD card.
- Connect the HDMI cable between the Raspberry Pi and the TV.
- On models with two HDMI outputs, use the primary port indicated in the 1Play instructions.
- Connect the Ethernet cable if you are using a wired network.
- Select the correct HDMI input on the TV.
- Connect the Raspberry Pi power supply last.
The player should boot and display its status on the TV.
If the television shows No Signal, do not continue to account registration yet. First confirm the selected HDMI input, cable, Raspberry Pi power indicator and correct HDMI port.
Step 4: Check the network and unique Playbox ID
After booting, wait for the TV to show UNREGISTERED PLAYBOX and a unique ID.
This is the expected first-boot screen. It means the player is running but has not yet been connected to your account.
Check that the on-screen internet status is OK. Ethernet is the simplest first test because it removes Wi-Fi credentials and signal quality from the setup. You can configure Wi-Fi afterward if required.
Do not publish or photograph the unique ID unnecessarily. Treat it as setup information used to register the player in the correct account.
Step 5: Add the Playbox to your account
Return to the 1Play dashboard and open the Playboxes section. Choose the option to add a new Playbox and enter the unique ID shown on the TV.
Give the screen a name that identifies its location and purpose. For example:
Main-Shop-EntranceReception-WelcomeCafe-Menu-01Office-KPI-ScreenGym-Class-Schedule
Clear naming feels unnecessary with one screen, but it becomes important as soon as you add another location or display.
Complete the required settings and wait for the Playbox status to turn green and show Online.
Step 6: Upload media and create your first playlist
Open the Media section and upload the simple test image prepared earlier.
Use a descriptive filename before uploading, such as:
reception-welcome-1920x1080.pngopening-hours-september-2026.jpgweekend-promotion-v02.mp4
Next, open Playlists, create a new playlist and add the uploaded image.
For the first test:
- use one media item;
- avoid complicated schedules;
- use a long enough display duration to inspect the screen;
- confirm that the correct file appears in the playlist;
- give the playlist a clear name, such as
First Screen Test.
This simple test confirms the complete chain before you add more content.
Step 7: Assign the playlist and verify playback
Assign the playlist to the new Playbox, then allow the player time to download and apply the content.
The total time depends on the media size and connection speed. A small Full HD image should synchronize faster than a large 4K video.
Confirm all of the following:
- the Playbox remains Online;
- the TV displays the correct image;
- the image fills the screen as intended;
- text is readable from the real viewing position;
- colors and brightness look appropriate;
- the dashboard screenshot matches the physical TV.
Your first digital sign is now live and remotely managed.
A Realistic Quick-Start Timeline
The phrase “set up digital signage in minutes” is realistic when the account, hardware, microSD card and media file are already prepared. It should not be interpreted as a guarantee that every first installation takes the same amount of time.
| Task | What affects the time |
|---|---|
| Create the account | Email access and registration details |
| Write the microSD card | Card speed, computer and image download |
| Connect the hardware | TV access and cable routing |
| Boot and register | Network availability |
| Upload the first image | File size and internet speed |
| Download and display | Player connection and media processing |
The most efficient approach is to prepare the account, card and test image at a desk, then install the player behind the TV only after it has passed an initial test.
What Content Can You Add Next?
After the first image works, expand gradually.
1Play supports:
- images and videos, including high-resolution content;
- web pages and dashboards;
- weather pages;
- HTML applications;
- compatible custom Linux applications;
- RTSP streams;
- scrolling text and RSS content.
For a first business screen, a short playlist of approved images and videos is usually the easiest starting point. Add live pages, applications or streams only when the basic screen is stable and the content source has been tested for unattended display.
The complete current list is available on the 1Play features page.
How to Build a Useful First Playlist
A first playlist should be simple enough to verify but useful enough to demonstrate the value of the screen.
For example, a five-item playlist could contain:
- a welcome screen;
- your main promotion;
- a product or service highlight;
- opening hours or practical information;
- a clear call to action.
Keep the loop short. A viewer may remain near the screen for only a limited time, so the most important message should not take several minutes to return.
Match the content to the screen location
The correct playlist depends on where the display is installed.
| Location | Useful first content |
|---|---|
| Shop entrance | Current campaign, opening hours, call to action |
| Reception | Welcome message, directions, services |
| Waiting area | Helpful information, announcements, promotions |
| Office | KPIs, safety messages, internal updates |
| Gym | Class schedule, membership offers, notices |
| School | Events, deadlines, timetables, announcements |
Start with one clear purpose. A screen trying to advertise, explain, entertain, provide directions and display live data at the same time may become difficult to follow.
First-Time Setup Problems and How to Fix Them
The TV shows “No Signal”
Check:
- the TV is on the correct HDMI input;
- the HDMI cable is fully inserted;
- the correct Raspberry Pi HDMI port is used;
- the Raspberry Pi receives stable power;
- the cable works with another device if possible.
Restart the TV and player after confirming the connections.
The screen shows “UNREGISTERED PLAYBOX”
This is normal before registration. Use the displayed unique ID to add the Playbox in the dashboard.
If you already registered it, confirm that the ID was entered correctly, the player has internet access and the dashboard shows the intended Playbox.
The Playbox does not become Online
Start with the network:
- test the Ethernet cable and router port;
- confirm that the Wi-Fi network is available at the screen location;
- restart the player;
- check whether the network blocks new devices or outbound internet access;
- follow the current recovery procedure in the 1Play FAQ if Wi-Fi credentials have changed.
The player restarts or behaves unpredictably
An unsuitable power adapter or TV USB port can cause unstable behavior. Use the correct Raspberry Pi power supply and disconnect unnecessary accessories during testing.
Also make sure the case is ventilated and that cables are not pulling on the ports.
The Playbox is Online but no content appears
Confirm that:
- media upload has completed;
- the media item is included in the intended playlist;
- the playlist is assigned to the correct Playbox or group;
- no schedule is preventing playback at the current time;
- the player has had enough time to download the file;
- the media format is supported.
Return to a single Full HD test image if necessary. Once that works, add the other items one at a time.
The image is cropped or surrounded by borders
Check the file aspect ratio and the TV picture settings. Most landscape TVs use a 16:9 image such as 1920 × 1080 or 3840 × 2160.
Disable picture modes that zoom or crop the HDMI signal. Depending on the manufacturer, the correct option may be called Screen Fit, Just Scan, 1:1, Original or something similar.
The content stops when the internet disconnects
First allow all required media to download while the Playbox is online. 1Play caches downloaded playlist content locally so it can continue playing during a temporary internet outage.
Live web pages, streams and other network-dependent content naturally require their external source to remain reachable. Offline continuity applies to content already downloaded to the player.
What to Do After Your First Screen Works
Do not add every feature on the first day. Build the system in controlled steps.
Add more media
Create a short, intentional loop and remove outdated files. Use consistent filenames and keep approved source files outside the dashboard as well.
Add a schedule
Once basic playback is stable, schedule different playlists by time of day, day of week or location.
Test schedule transitions while someone can see the physical display. Time zones and start or end times should be checked before an important campaign.
Create screen groups
Groups become useful when several Playboxes should receive the same content. Name groups by a clear business purpose, such as All Receptions, Shop Windows or Bucharest Locations.
Use remote screenshots
Near-real-time screenshots help confirm what the player is displaying without visiting the screen. They are especially useful after a content update.
Review proof-of-play data
Proof-of-play reports help verify what ran, when it played and for how long. This becomes valuable for paid campaigns, internal compliance or operational checks.
Test offline playback
After the playlist has downloaded fully, safely interrupt the network connection without removing player power. Confirm that stored content continues playing, then restore the connection and check that the Playbox returns Online.
How Much Does Your First Digital Sign Cost?
If you already own a suitable TV, the main one-time cost is the Raspberry Pi player kit: board, microSD card, power supply, HDMI cable and optional case.
1Play uses pay-as-you-go pricing. The standard software rate is €0.19 per active screen per day, equivalent to €5.70 per 30 days, excluding VAT. Volume pricing can reduce the daily rate, and an inactive screen does not consume paid usage.
Every new account includes 30 free testing days, with no credit card required. Check the current 1Play pricing page before making a final budget.
Digital Signage First-Screen Checklist
Before considering the installation complete, confirm:
- The TV has a working HDMI input.
- The Raspberry Pi uses a reliable power supply.
- The 1Play image was written and verified successfully.
- The player boots without unexpected restarts.
- Internet status is OK.
- The correct Playbox ID was registered.
- The Playbox shows Online in the dashboard.
- One simple test image is uploaded.
- The image is included in a playlist.
- The playlist is assigned to the correct screen.
- The physical TV and dashboard screenshot match.
- Text is readable from the intended viewing position.
- The TV is not cropping the HDMI image.
- Stored content continues during a safe offline test.
- Cables and the player are mounted securely with ventilation.
Frequently Asked Questions
What is the easiest way to get started with digital signage?
Use one TV with HDMI, one Raspberry Pi 5 or Pi 4, a prepared 1Play microSD card and one simple Full HD image. Register the Playbox, create a one-item playlist and verify playback before adding more features.
Do I need a smart TV for digital signage?
No. The external Raspberry Pi player handles the content and cloud connection. The TV only needs a suitable HDMI input and display performance for the location.
Can I use a TV I already own?
Yes, if it operates reliably, has HDMI and is bright enough for the installation area. Check the manufacturer’s guidance if you plan long daily operating hours or portrait mounting.
Which Raspberry Pi should I use?
Raspberry Pi 5 or Raspberry Pi 4 is recommended. Pi 5 is the preferred choice for new 4K projects, while Pi 4 is suitable for many Full HD installations.
How large should the microSD card be?
Use a Class 10 card with at least 16 GB. Storage requirements increase with the number and size of downloaded media files.
How long does digital signage setup take?
Registering the player and publishing a small test image can take only a few minutes after the account, microSD card and hardware are ready. Writing the card, downloading software and installing cables may take longer.
Can I set up 1Play without technical experience?
Yes. The ready-to-use 1Play image removes the need to install and configure a general-purpose operating system manually. Follow the DIY steps and test one screen before expanding.
Does digital signage need continuous internet?
The internet is required for registration, remote updates and synchronization. Downloaded playlist media is cached locally and continues playing during a temporary connection interruption. Live web content still depends on network access.
Can I update the screen remotely?
Yes. Upload new content, update or create a playlist and assign it from the cloud dashboard. The player must reconnect to receive changes.
Can I manage more than one screen?
Yes. Add one Playbox for each independently managed TV, organize players into groups and control them from the same dashboard.
What should I display first?
Start with one landscape image containing a welcome message, opening hours or a simple promotion. A single test file makes it easier to identify hardware, network or playlist problems.
Can I use a USB stick instead?
A USB stick may be sufficient for one screen with content that rarely changes. It does not provide the same centralized scheduling, monitoring, remote updates or proof-of-play workflow. Read the full digital signage vs USB stick comparison.
Your First Screen Is the Beginning, Not the Final System
The best way to start digital signage is to keep the first test deliberately simple.
Use one TV, one Playbox, one image and one playlist. Confirm the full path from dashboard to screen. Then add more media, schedules, groups and locations only after the basic workflow is reliable.
This approach gives you a working result quickly and makes troubleshooting much easier. It also lets you evaluate the screen in its real environment before investing time in a large content library or a multi-location rollout.
With 1Play, you can reuse a suitable HDMI TV, prepare an affordable Raspberry Pi player and manage the screen remotely without installing a local server.
Start your free 30-day 1Play trial, prepare one Full HD image and publish your first digital sign today.